Maintenance Manual for Sliding Windows in Ifor Williams Horse Trailers
Maintenance Manual for Sliding Windows in Ifor Williams Horse Trailers
Also replacement procedures for slider plastic, sliding felt, glass, catch/dummy catch, catch block and seals
![]() View/download the sliding windows manual
View/download the sliding windows manual
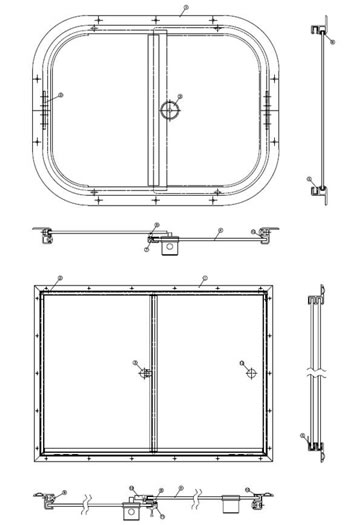
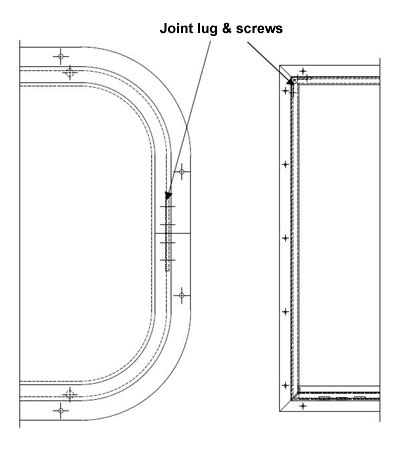
WINDOW CROSS SECTION
GENERAL NOTE
Throughout this manual you will find numbers in brackets in the main text. These numbers should be read in conjunction with the window cross section image above.
PREVENTATIVE MAINTENANCE
In order for the unit to work correctly over its lifetime the following procedures must be completed periodically as stated?
A visual examination of the unit checking for dents, cracks or marks that may affect the integrity of the unit. As well as any items that have aged or are loose that may affect the operation of the unit. All areas shown in the window cross section image of the maintenance manual should be examined.
1. Full opening and closing of the unit ensuring the unit seals when closed; and opens smoothly to its full extent without foul.
| Maintenance | Frequency |
|---|---|
| Visual examination of unit. | Minimum of once per Month. |
| Visual examination of unit. | Minimum of once per Month. |
| Clean the unit | Once a month |
| Unit opening and closing | Minimum of once per week. |
| Replace slider plastic | As required (2 years minimum) |
| Replace felt | As required (2 years minimum) |
| Replace Seals | As required (2 years minimum) |
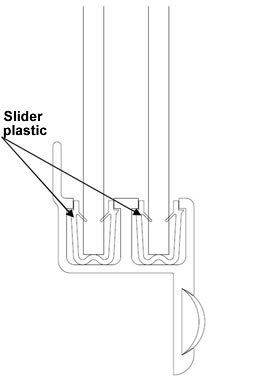
SLIDER PLASTIC REPLACEMENT (5)
(To replace glass the frame must be free from vehicle).
1. Remove entire unit from vehicle.
2. Place on workbench.
3. Unscrew the joint lug screws and keep for re-assembly.
4. Dismantle framework.
5. Slide glasses out of channels.
6. Using a flat ended screwdriver prise / unclip the slider plastic out of the channel.
7. Push fit replacement slider plastic into channel.
8. Re-assembly is the reverse of removal (seal around rail ends with sealant).
9. Check for water ingress.
10. Reseal if required.
11. Check unit operation.
12. End.
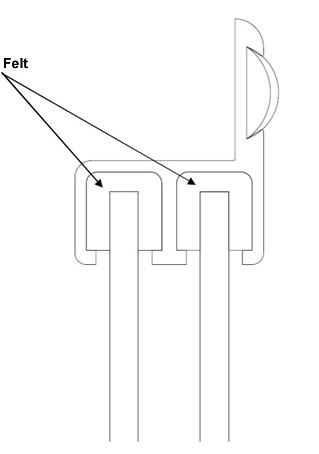
FELT REPLACEMENT (10)
(To replace glass the frame must be free from vehicle).
1. Remove entire unit from vehicle.
2. Place on workbench.
3. Unscrew the joint lug screws and keep for re-assembly.
4. Dismantle framework.
5. Slide glasses out of channels.
6. Remove the felt from the channels.
7. Remove any remaining adhesive.
8. Apply new adhesive (Bostik c) and fit new felt.
9. Re-assembly is the reverse of removal (seal around rail ends with sealant).
10. Check for water ingress.
11. Reseal if required.
12. Check unit operation.
13. End.
GLASS REPLACEMENT (4)
(To replace glass the frame must be free from vehicle).
1. Remove entire unit from vehicle.
2. Place on workbench.
3. Unscrew the joint lug screws and keep for re-assembly.
4. Dismantle framework.
5. Slide glasses out of channels.
6. Fit replacement glasses into channels.
7. Re-assembly is the reverse of removal (seal around rail ends with sealant).
8. Check for water ingress.
9. Reseal if required.
10. Check unit operation.
11. End.
CATCH / DUMMY CATCH REPLACEMENT (3 & 13)
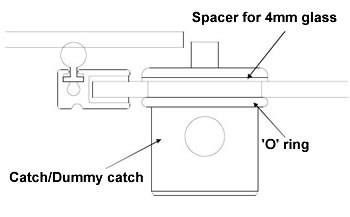
1. Using a flat ended screwdriver prise the ?O? ring off the back of the catch.
2. Remove the catch.
3. Fit replacement catch ensuring to use a spacer if glass thickness is 4mm.
4. Check unit operation.
5. End.
CATCH BLOCK REPLACEMENT (12)
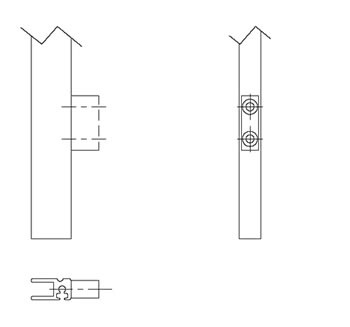
6. Unscrew catch block retaining screws into draughtrail.
7. Remove worn catch block.
8. Fit replacement catch block.
9. Screw to draughtrail.
10. Check unit operation.
11. End
SEAL REPLACEMENT (8)
1. Remove entire unit from vehicle.
2. Place on workbench.
3. Unscrew the joint lug screws and keep for re-assembly.
4. Dismantle framework.
5. Slide glasses assemblies out of channels.
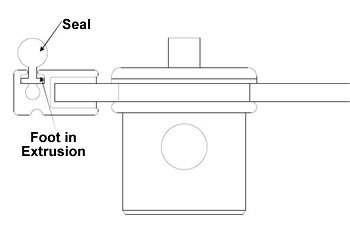
6. Slide or prise worn seal out of the foot in the aluminium extrusion with a flat ended screwdriver
7. Slide new replacement seal into the foot in the aluminium extrusion.
8. Re-assembly is the reverse of removal (seal around rail ends with sealant).
9. Check for water ingress.
10. Reseal if required.
11. Check unit operation.
12. End.
